There’s nothing quite like waking up in the crisp morning air, surrounded by nature, and sipping on a hot, fresh cup of coffee. Whether you’re deep in the woods or at a cozy campsite by the beach, one thing remains non-negotiable: good coffee is essential.
Here are my top five favorite methods for making camping coffee, from quick and easy solutions to more involved, but rewarding, techniques. Let’s dive in!
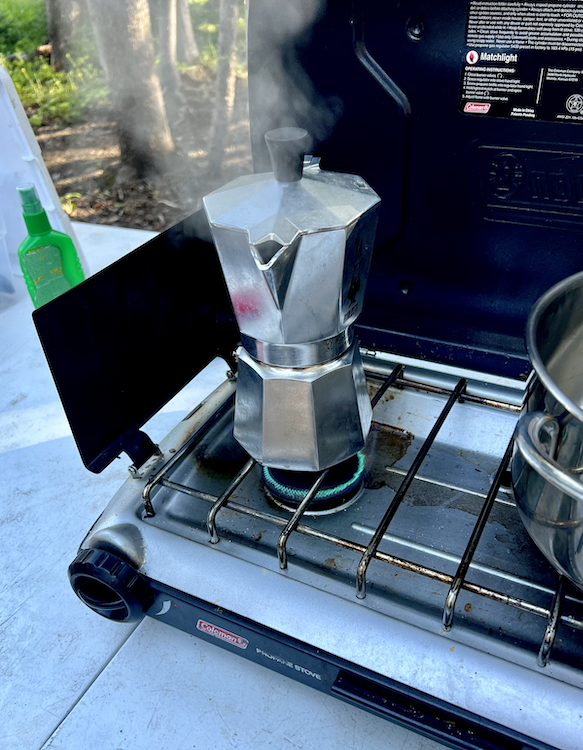
1. Bialetti on a Camp Stove: The Fancy Espresso Option

If you’re a fan of espresso and like to keep things a bit more refined even while camping, the Bialetti (or any stovetop espresso maker) is your go-to. Bialetti’s compact design makes it ideal for travel, and it produces strong, espresso-style coffee with minimal fuss.
What You’ll Need:
- A Bialetti (Moka pot)
- Camp stove and fuel
- Ground coffee (medium-fine grind)
How to Brew:
- Fill the bottom chamber of the Bialetti with water (up to the safety valve).
- Add ground coffee to the filter basket, leveling it off without packing it down.
- Assemble the Bialetti and place it on your camp stove.
- Heat on medium until you hear that iconic gurgling sound, signaling that the coffee is ready.
- Remove from the heat and pour yourself a rich, bold shot of espresso.
I love using the Bialetti while camping because it gives me a real coffeehouse vibe out in the wild. Just add some steamed milk (or powdered milk if you’re really roughing it) for an impromptu latte by the fire.
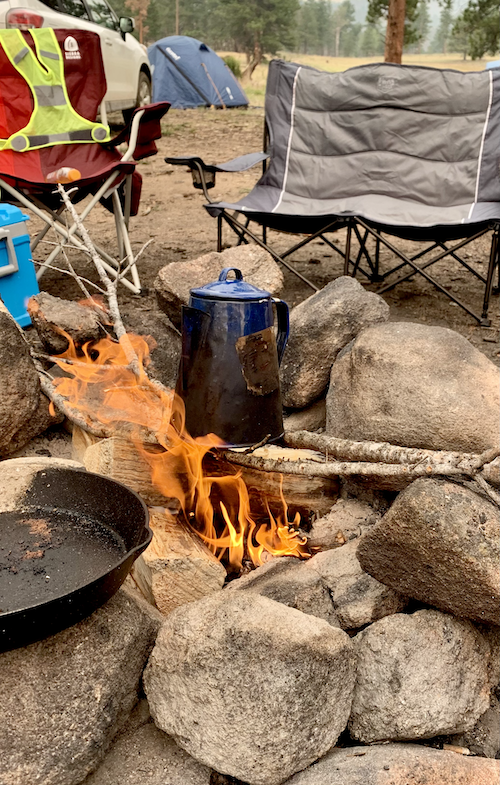
2. Percolator for Camping: The Classic Approach

The percolator is probably the most traditional way to make coffee while camping, and there’s a reason for it—simplicity and nostalgia! Percolators have been the go-to for campers for decades. They’re sturdy, reliable, and perfect for making coffee in large batches.
What You’ll Need:
- A campfire or camp stove
- Percolator (available in various sizes)
- Coarse-ground coffee (to avoid clogging the filter)
How to Brew:
- Add water to the bottom of the percolator.
- Place your coarse-ground coffee into the basket.
- Set the percolator on your stove or directly over the campfire and let it heat slowly.
- Watch (or listen) for the coffee to start bubbling up through the central tube. Let it percolate for about 5-10 minutes, depending on how strong you like it.
- Remove from heat and pour.
While some people think percolators make coffee that’s too strong or even bitter, I personally love the robust flavor. It’s the type of coffee that feels right when you’re sipping it out of an old tin mug while watching the sunrise.
3. Concentrate Cold Brew: When You Don’t Want to Fuss with Heat
If you’re a cold brew lover like me, then you probably think about it even when you’re heading out into the wilderness. The good news? You can bring your favorite cold brew concentrate with you, making it an incredibly easy camping coffee option without taking up much space.
What You’ll Need:
- A bottle of cold brew concentrate (I recommend Jot for its smooth, rich flavor. They’re also based out of Boulder, CO.)
- Water (or milk/creamer, depending on preference)
- Ice (optional, but nice to have)
How to Brew:
- Mix 1 tablespoon of Jot concentrate with 8 ounces of water (or milk, if you like a creamier option).
- Add ice if you’ve got it, or just drink it straight if you’re keeping things simple.
Cold brew concentrate like Jot is a camping game-changer, especially when you’re too lazy to start a fire or heat water first thing in the morning. Just pour, mix, and you’re ready to go. The best part? It’s smooth and not bitter like traditional iced coffee.
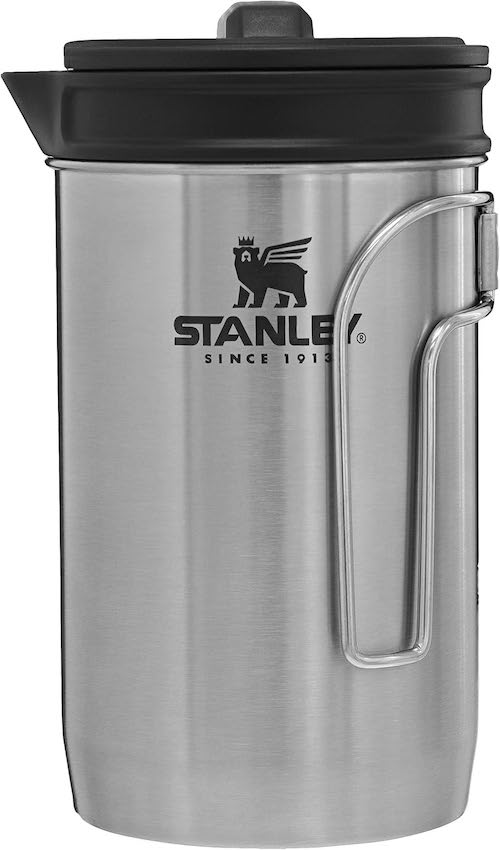
4. French Press: The Balanced and Smooth Choice

French press coffee strikes a perfect balance between ease of use and a great-tasting brew, making it one of my favorite methods for camping. You can get compact French presses specifically designed for travel, and they’re durable enough to withstand being tossed around in a backpack.
What You’ll Need:
- A portable French press (I recommend this one where you can boil water directly in the press.)
- Coarse-ground coffee
- Hot water
How to Brew:
- Heat your water to a boil.
- Add about 1 tablespoon of coffee per 4 ounces of water to the French press.
- Pour the hot water over the grounds, stir, and let it steep for 4 minutes.
- Press down the plunger slowly and carefully, then pour.
The French press method gives you a full-bodied cup of coffee that’s smooth without being too intense. It’s a little more involved than instant coffee, but worth it for the flavor if you’ve got the time.
5. Instant Coffee: The Quick and Easy Method
Okay, I know what you’re thinking—instant coffee? But hear me out! Modern instant coffee has come a long way, and when you’re on a short hike or a quick overnight camping trip, it’s hard to beat for convenience.
What You’ll Need:
- Hot water
- Instant coffee packets
How to Brew:
- Heat up water over your campfire, stove, or even from your thermos if you’re on the go.
- Stir in your instant coffee packet.
- That’s it—you’re done.
Brands like Starbucks Via and Mount Hagen offer instant coffee that actually tastes like coffee. It’s not fancy, but it gets the job done, and sometimes, that’s all you need when you’re out exploring.
Final Thoughts
Whether you’re looking for convenience or want to get fancy with your camp coffee, there’s a brewing method for every type of camper. From the quick-fix options like instant coffee and cold brew concentrate to the more satisfying brews like the Bialetti, percolator, or French press, you don’t have to sacrifice your love of good coffee just because you’re out in the wilderness.
So, pack your favorite beans (or concentrate), grab your brewing gear, and get ready to enjoy the perfect cup of camp coffee.


Leave a Reply